 Critters is coming to Kickstarter.
 In this chapter
- Card types
- Farm cards
- Items
- Item Sub-types
- Treats
- Tools
- Finance
- Gifts
- Critters
- Energy and Sleepy
- Talents
- Exhaustion
- Seeds
- Gaining Sunlight
- Harvesting Seeds
- Extended Seed Effects
- Favours
- Free Favours
- Work Orders
- Packing Crates
- Overtime packing
- Completing Work Orders
- Rewards
- Victory Points
- Reward Bonuses
Card types
Farm cards
Farm cards are the cards you buy into your own deck. There are 3 sub-types: , and .
Every Farm card has a Price-tag: the crops you must spend from your Stash to Buy it, and the crops you'd get back if you ever it.
A bought Farm card goes to your Discard pile. After your next deck , it's part of your rotation.
Items
cards carry a backpack icon at the bottom left.
Play an from your hand and its Effect triggers immediately. Once every part of the effect has resolved, the card goes to your Discard pile.
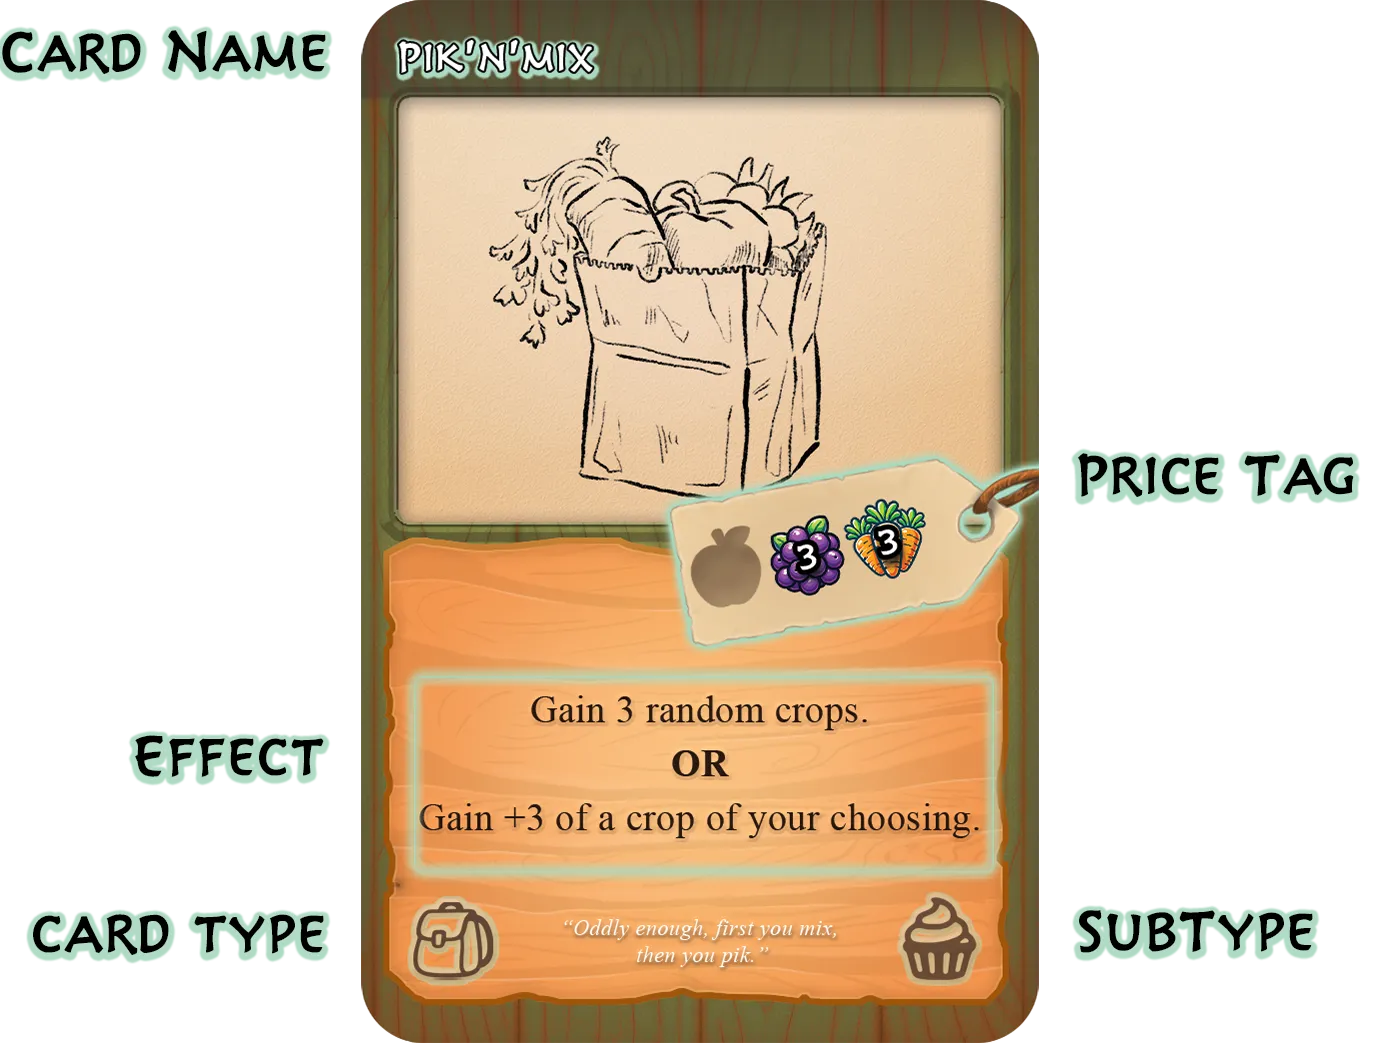
Item card breakdown.
Item Sub-types
Every is one of 4 Sub-types: , , or .
Treats
cards are about gaining crops: great early buys to get your production moving.
synergies usually your back in, letting you play them more than once per deck cycle.
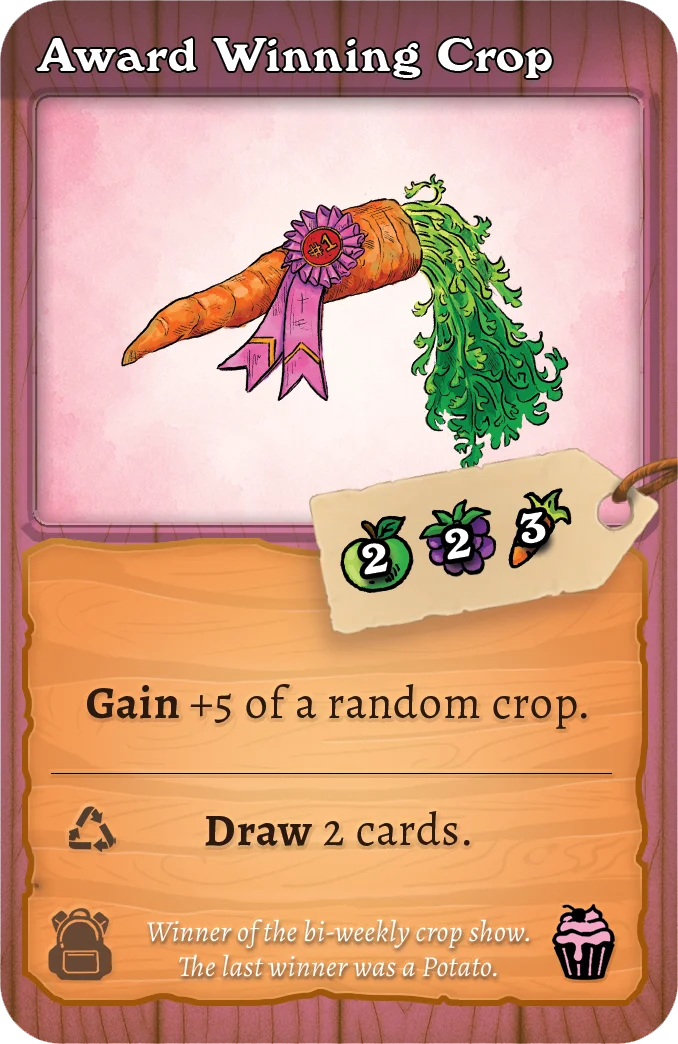
Example of a Treat card.
Tools
cards are flexible, but shine when combined with other cards. Think about what else is in your deck and set up powerful future turns.
synergies usually your , parking them on top of your draw pile for a big next turn.
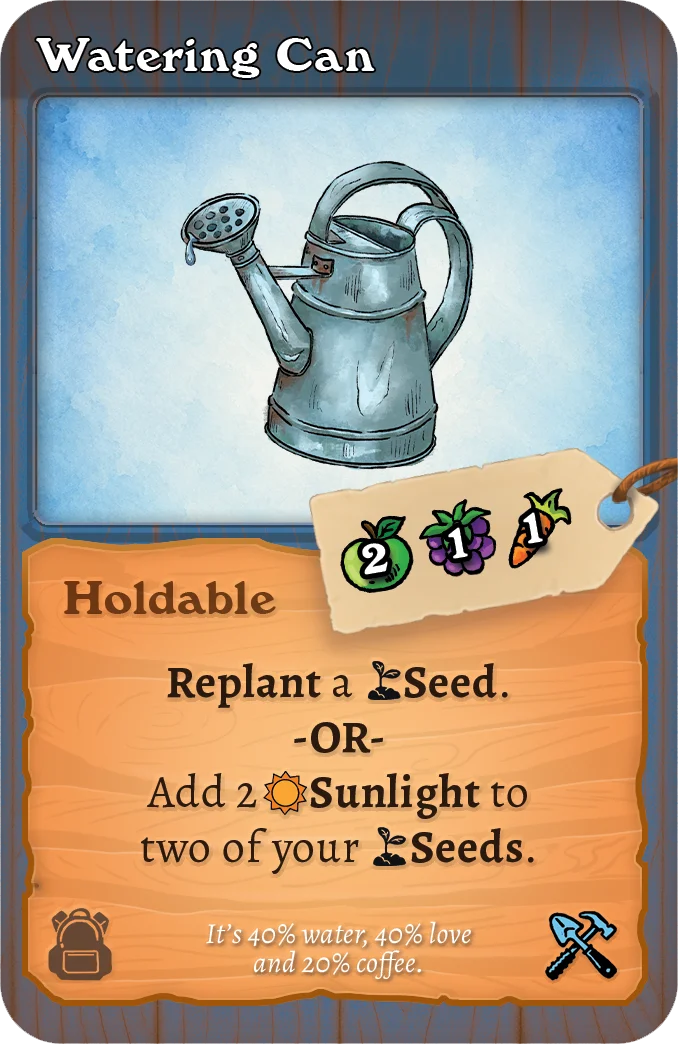
Example of a Tool card.
Finance
cards centre on Buying, , and . They are powerful for streamlining your deck while turning a profit.
synergies let you fire Sell and Trash triggers without actually removing cards.
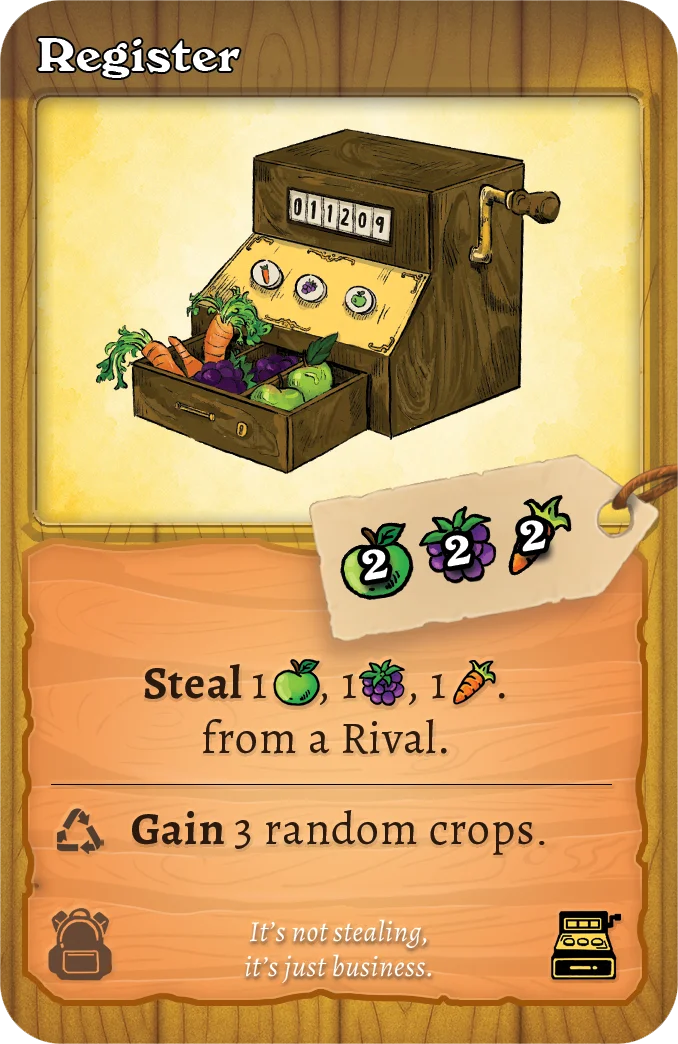
Example of a Finance card.
Gifts
are rarer than the other sub-types, and you don't buy them for yourself. them to a Rival to clog their deck in a variety of unpleasant ways.
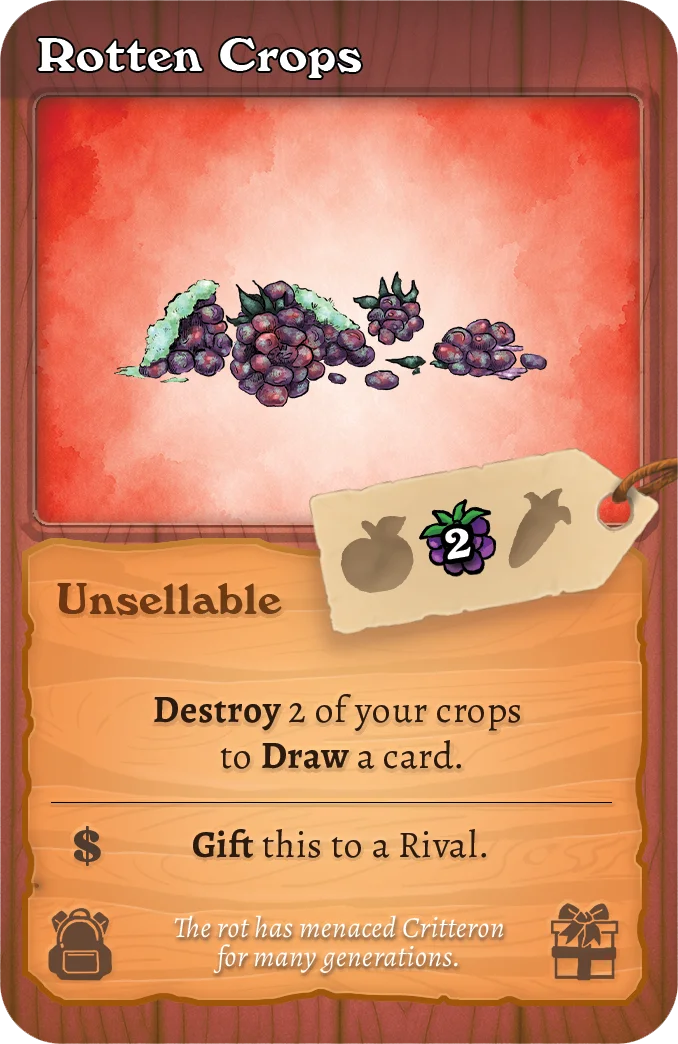
Example of a Gift card.
Critters
cards carry a pawprint icon at the bottom left.
Play a from your hand and it goes face-up into your Play Area. there are your Active : your farmhands, working turn after turn until they tire out.
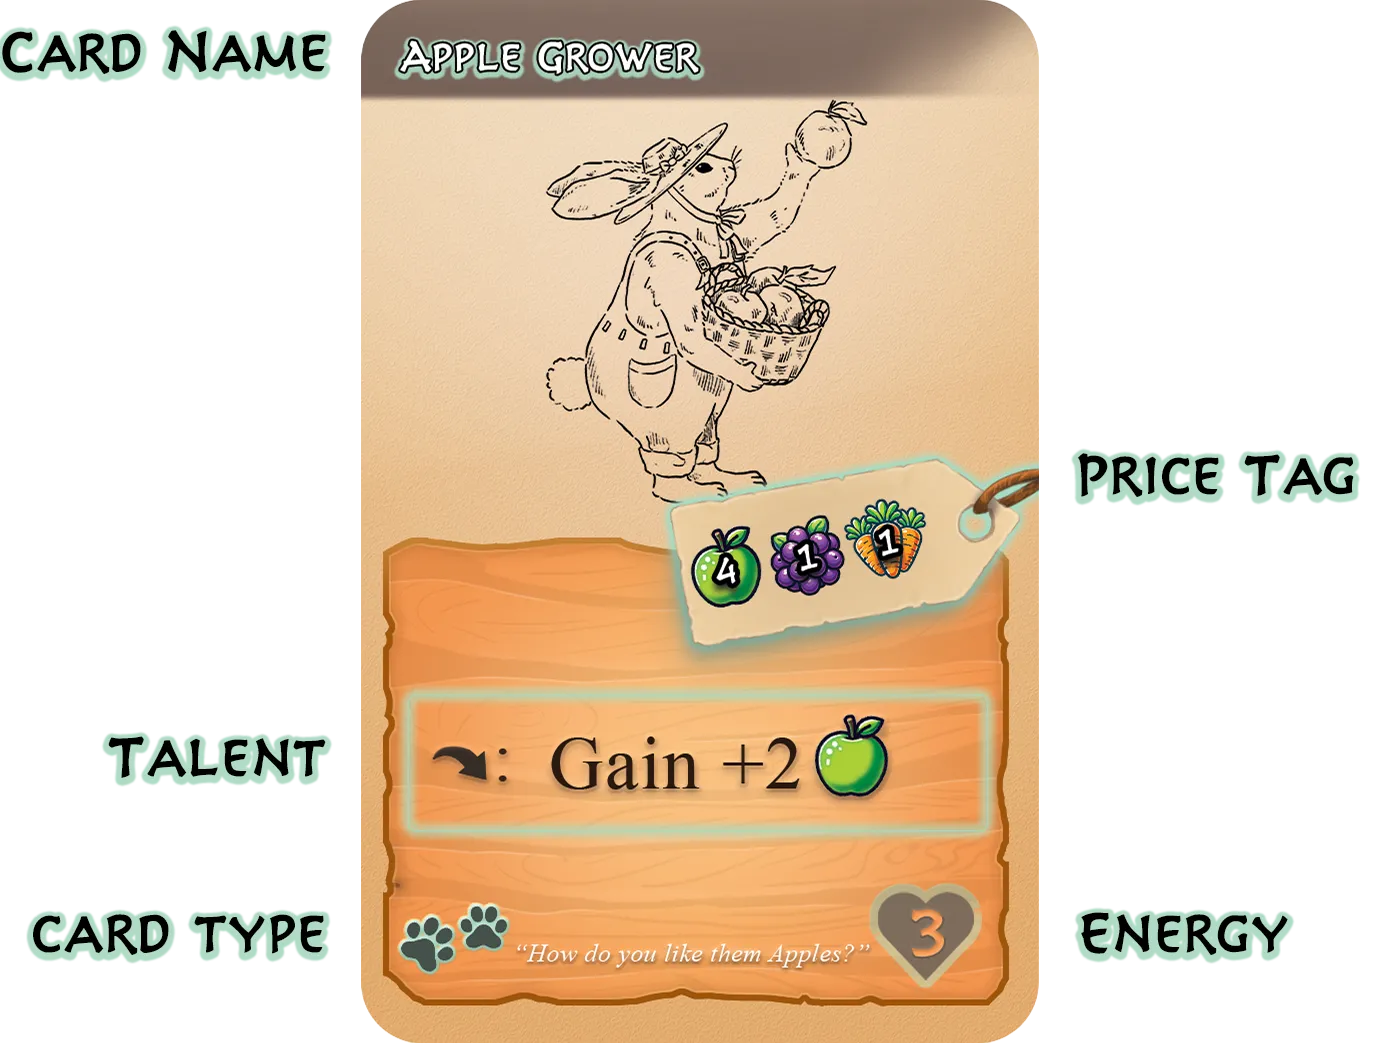
Critter card breakdown.
Energy and Sleepy
Every has an number in the heart icon at the bottom right. That's how much work they have in them. Each performed adds a counter.
Talents
Each has a , marked by the arrow icon in its card box. An Active can perform its once per turn: resolve the effect, add 1 counter, and rotate the card 90° clockwise to show it's been used this turn.
Exhaustion
When an Active 's counters equal its , it is Exhausted: remove its counters and put it in your Discard pile.
Don't worry: after a good night's sleep it'll cycle back through your deck, fresh and ready to work.
Seeds
are the patient farmer's card: very efficient for their price, if you can wait.
Play a from your hand and it goes face-up into your Play Area. there are Planted.
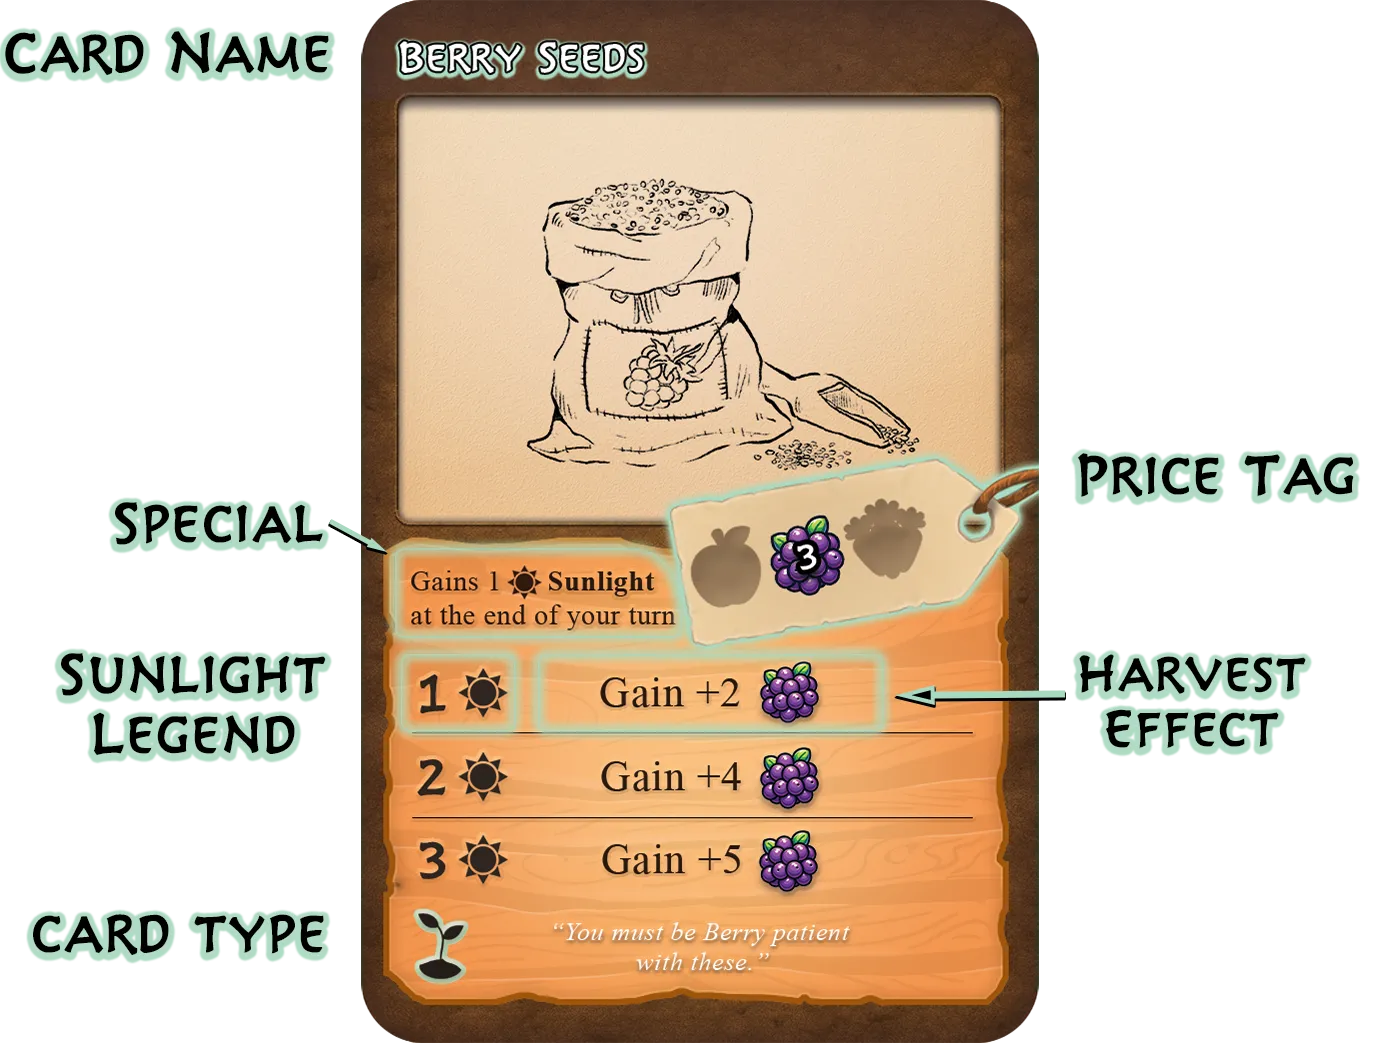
Seed card breakdown.
Gaining Sunlight
At the end of each of your turns, every one of your Planted gains 1 counter, up to a maximum of 3.
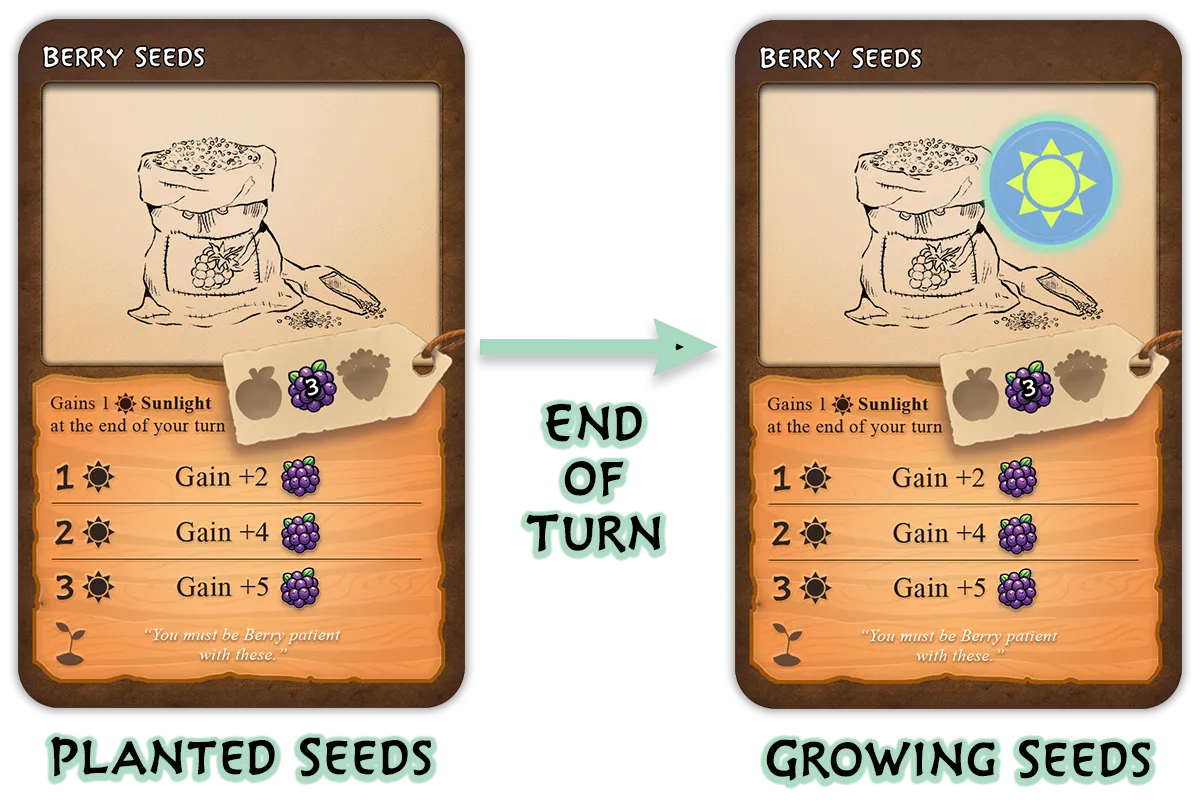
Planted Seeds gaining Sunlight.
Harvesting Seeds
During your turn you may a Planted whose counters match a row of the card's Legend. Resolve the effect for that row, then put the in your Discard pile.
More means a better harvest. Patience pays.
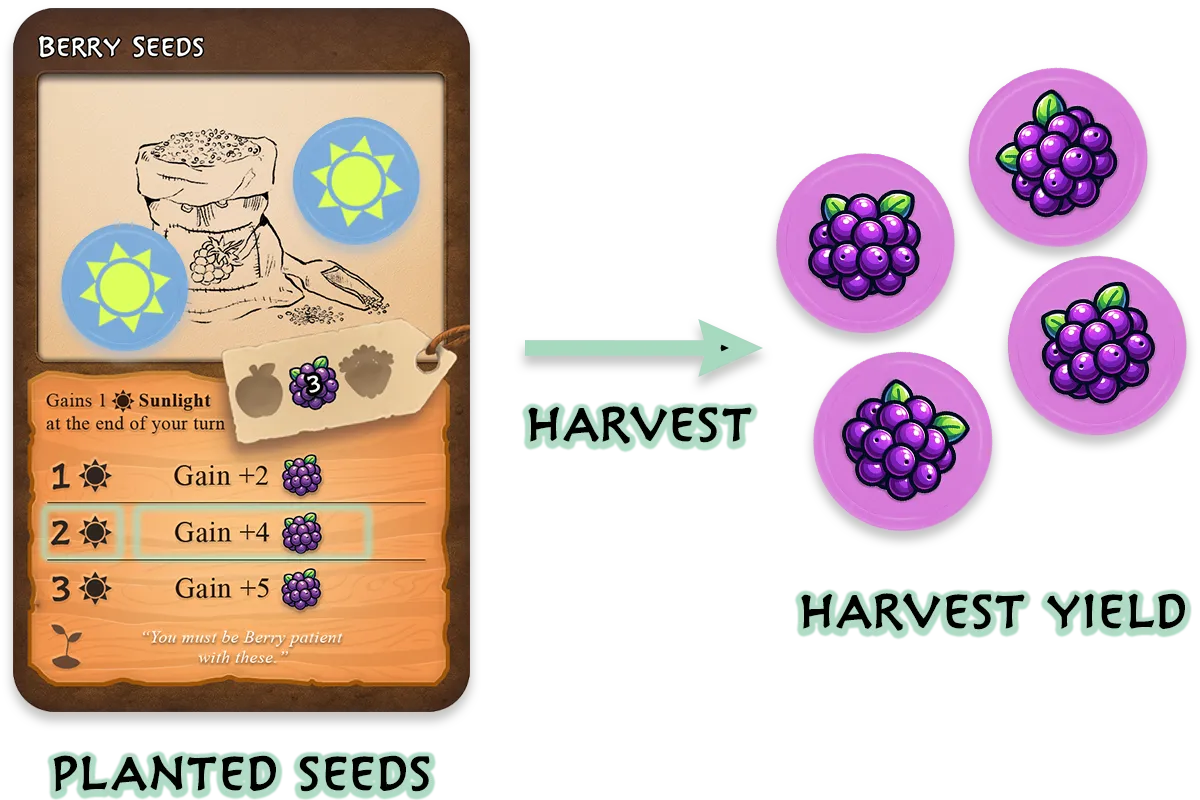
Harvesting Planted Seeds.
Extended Seed Effects
Some extend their effect as they grow, shown by a trailing "..." joining one legend row to the next.
When you at the higher row, resolve the earlier row's effect and the extension after the "..." as one combined effect.
Favours
Every costs "Any 2 crops": spend any combination of 2 crops from your Stash to Buy one from the Market.
A 's effect happens immediately when bought. It then goes to the discard pile (next to the deck in the Market): it never enters your deck.
The deck holds a wide variety of effects; some appear twice, others only once.
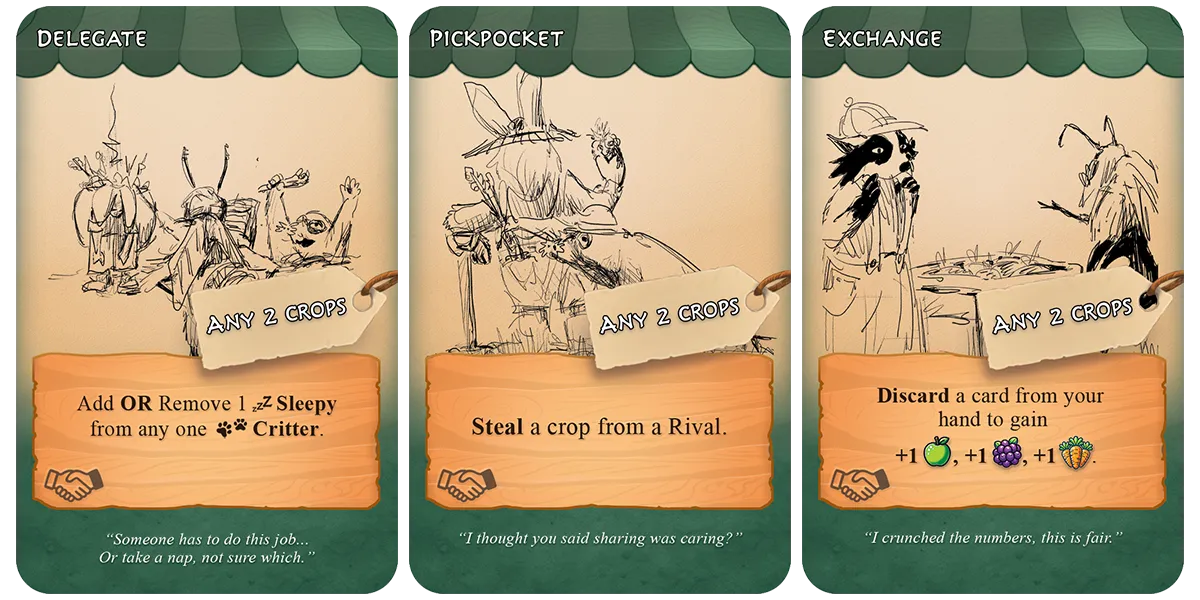
Examples of a few Favour cards.
Free Favours
Some cards say "Get a from the Market for free." Choose any face-up in the Market and perform its effect as though you'd bought it.
Everyone starts with 2 Friendship Charm cards in their deck. Make them count whenever they come up.
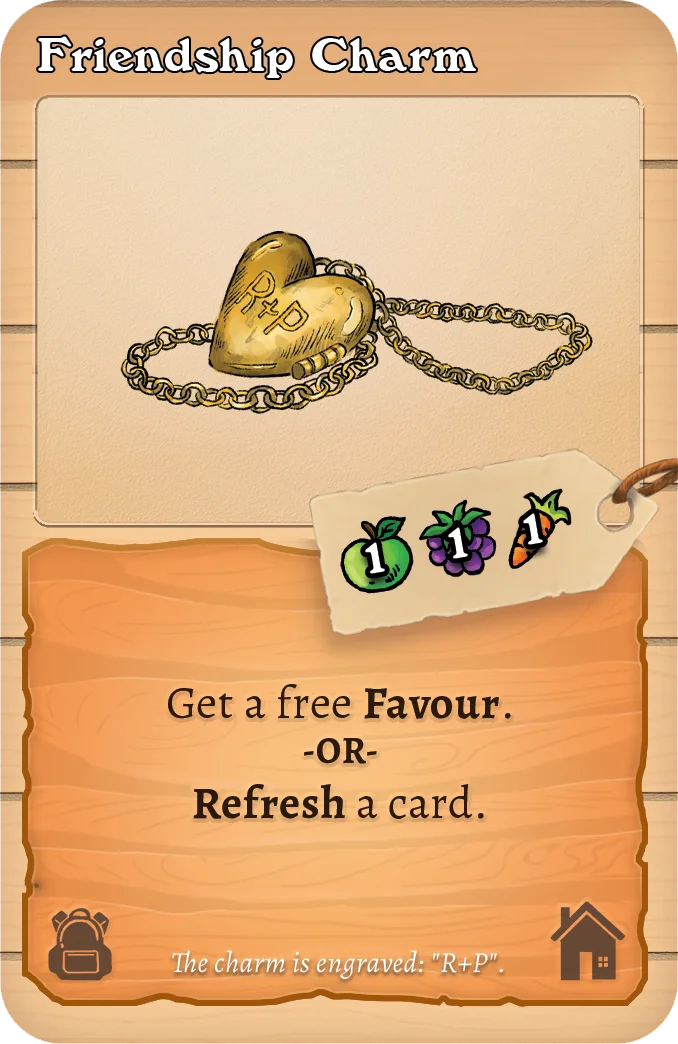
Example of a 'free favour' card effect.
Work Orders
When you Buy a , place it face-up in your Play Area. You may have up to 3 at a time.
are how you win: each completed order earns a card, and 5 ends the game.
To complete one, pack the required number of into it, usually over several turns. The card shows which crops each requires, and how many finish the job.
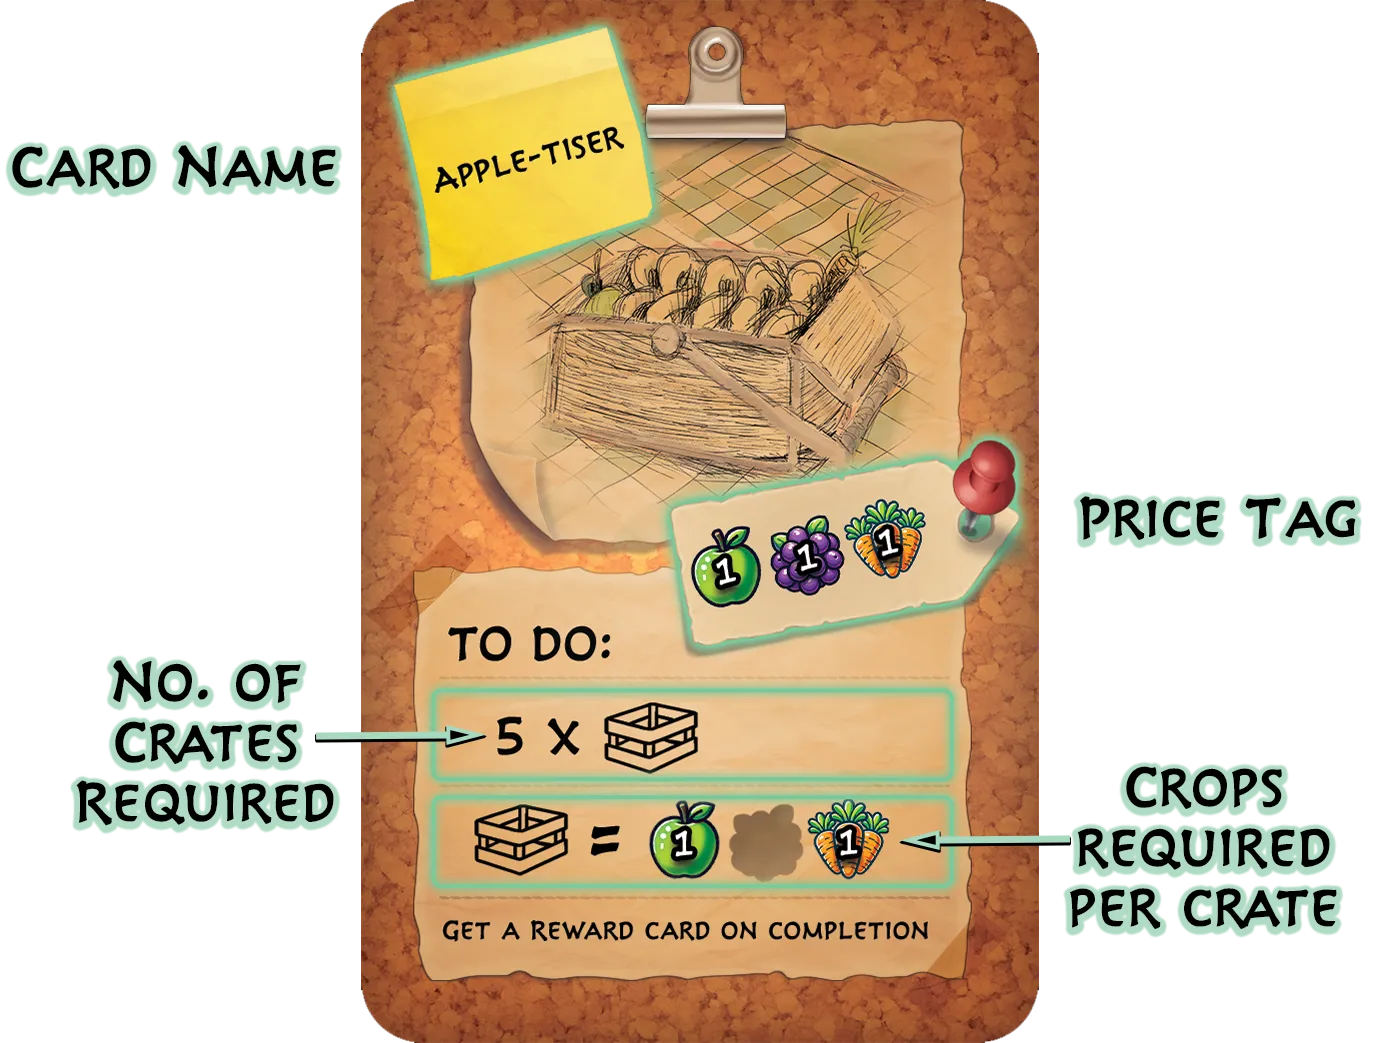
Work Order breakdown.
Packing Crates
Pack a by spending its listed crops from your Stash, then placing a counter on the .
Normally each of your can be packed once per turn. After packing one, rotate it 90° clockwise as a reminder.
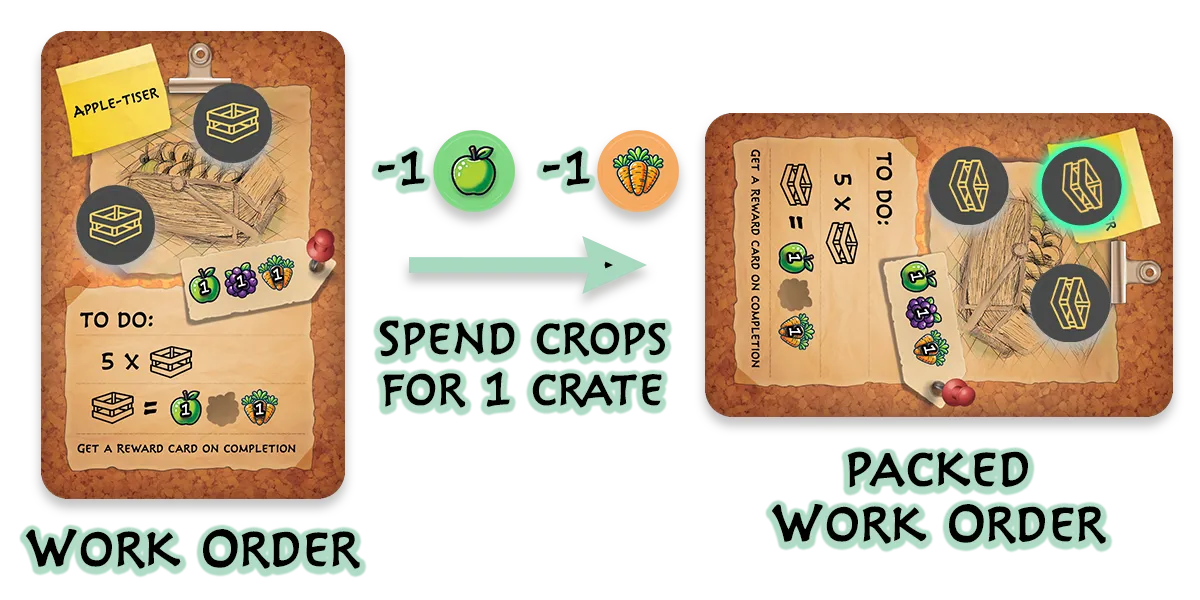
Packing a crate into a Work Order.
Overtime packing
Want to pack a that's already been packed this turn? That's , and the crew charges extra: 1 Apple, 1 Berry and 1 Carrot on top of the 's normal cost, for every additional that turn.



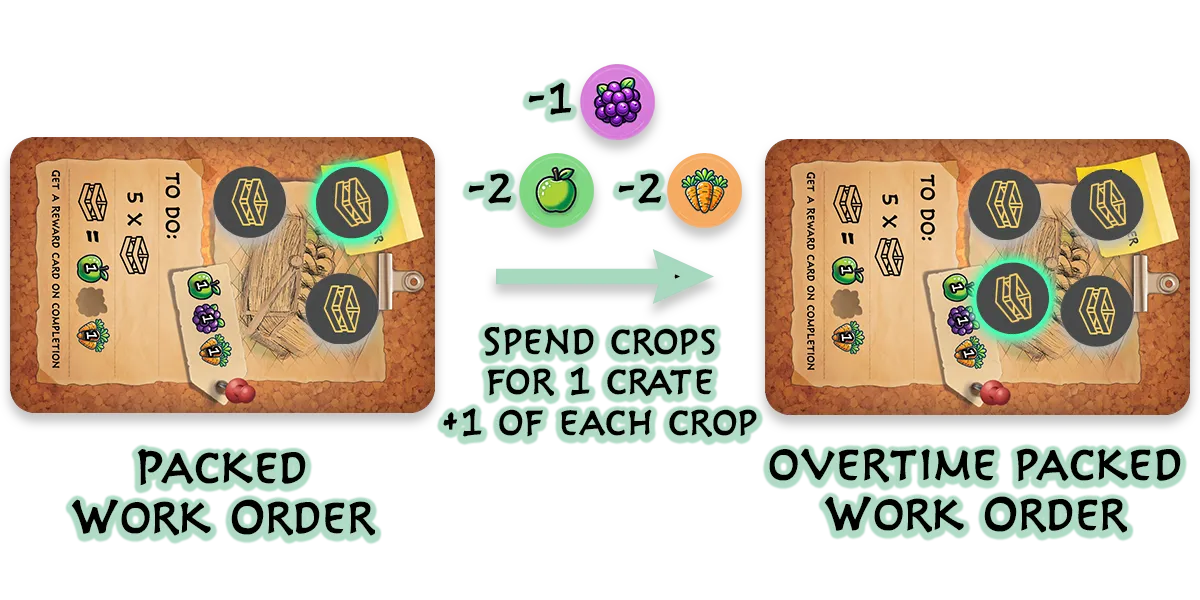
Overtime packing example.
Completing Work Orders
Once a holds its required , you may Complete it: choose one of the 4 face-up cards in the Market and place it in your Play Area. That's +1 Victory Point.
Then clear the counters and put the completed in the Work Order discard pile.
Rewards
Each completed lets you choose one of the 4 face-up cards in the Market.
A is worth 1 Victory Point and grants a permanent bonus to your Farm for the rest of the game.
Victory Points
Each is 1 Victory Point. Reach 5 Victory Points and you win the game on the spot.
Reward Bonuses
Every carries its own bonus effect, active for the rest of the game. Choose with your deck in mind, because the right can snowball a strategy.